Showing posts with label Social Widgets. Show all posts

Tuesday, 23 October 2012

Awesome And Simple Softwaresntrick-Social Widget With Subscription Box

Awesome And Simple Softwaresntrick-Social Widget With Subscription Box

Am sharing with you again another cool subscription box which comprises of subscription box, and social sharing buttons. In my previous post, there is so so many widgets and it is another to that is simple but stylish. I have design it to the perfect taste so that it wouldn't affect your blog loading time. To add this subscription box to your blog, In this I put a Email subscription from and three social sharing link FaceBook, Twitter, LinkedIn, Google+, YouTube, Rss And Other Social , so that this widget fulfill your both requirement. I used CSS3 to rotate these on hover design this widget so it take only few seconds to load. This Widget can be add in Blogger, WordPress or Any other HTML website. simply follow the few steps below.


Features:
1.) Social Network Icon With Subscription Box.
2.) Twist The Icons On Hover.
3.) FaceBook, Twitter, LinkedIn, Google+, YouTube, Rss And Other Social.
4.) Simple And Stylish Design.
5.) HD Icons.
6.) Quick To Load CSS.


How To Add In Blogspot?
1.) Go To Your www.blogger.com
2.) Open Your Desire Blog.
3.) Go To Layout.
4.) Click "Add A Gadget" Where You Want To Add It.
5.) Now Scroll To "HTML-JAVASCRIPT"
6.) Click "+" Icon To Add It.
7.) Now Copy The Below Code And Paste It To There.
8.) Leave The Title Empty.
9.) Click Save, Now You Are Done.


How To Add In Website?
1.) Just Go To Your HTML File.
2.) Now Copy The Below Code And Paste It Between <body> </body>.
3.) Save It, Now You Are Done.


<!-- This Is A CopyRight Code Of softwaresntrick.It Is Free To Use But With HTML Design Code.If AnyOne Found To Be Changing This Code Should Be Under Legal Action Via DMCA. -->
<style>
#exeideasbody {
background:#f8f8f8;
margin:0 0 40px 0;
padding:10px;
border: 3px outset #ff0000; -moz-border-radius: 10px; border-radius: 10px;
overflow:hidden;
font-size: 14px;
}
.spinning_icons a{
width:36px;
height:36px;
display:inline-block;
text-indent:-9999em;
background-position:0 0;
background-repeat:no-repeat;
z-index:2000;
overflow:hidden;
}
.spinning_icons a:hover{
transform: rotate(360deg);
-webkit-transform: rotate(360deg);
-moz-transform: rotate(360deg);
transition: transform 0.2s ease-out;
-webkit-transition: -webkit-transform 0.2s ease-out;
-moz-transition: -moz-transform 0.2s ease-out;
}
.twitter{ background:url('https://blogger.googleusercontent.com/img/b/R29vZ2xl/AVvXsEjxwuj-DLGAkIoXJT-TRcTtlPb7yCYnnwRDhU1kiT0g2cJ_hxDMGq0SX_nQt7XhvDlCnRrXlkq_NZMc5QIRMKTQnUlSiBMMT0_s-2kiqBx2cVL7K1uuokvG2cYMczTRYqu3FFhKLNpuIJ4/s0/twitter.png'); }
.facebook{ background:url('https://blogger.googleusercontent.com/img/b/R29vZ2xl/AVvXsEiUgkQc-RqFmlr3SAxaR_ue6qwzmLdGqfZfTE_6zX8EeCIUEB-lggweX-T5cqoWYTY45Y3RZ9k5Et0CnSRW3uhHR8x3awmIDQ0rS-h_iNx-qC8OIJhu1ed1_V2HgEDDzF4NddK91f5b5BU/s0/facebook.png'); }
.linkedin{ background:url('https://blogger.googleusercontent.com/img/b/R29vZ2xl/AVvXsEhrDNnbExQra8b8FO-i8cwM7-jIElOuD64dYpDxVLFFRGlmPNUhuLYcK64RzjkvuKGlKy-_RUg_YnSZCbZ4deonWjzcWFUZQVaqwbQfb-5wBvnJ2pl1RlbNcIApiDGtQJKdx-OGr90Wxg0/s0/linkedin.png'); }
.rss{ background:url('https://blogger.googleusercontent.com/img/b/R29vZ2xl/AVvXsEjp4l9-Mc5U6X9_8nD902GpY4sTyIspLBJZbwuIw4EPdUi0su4nfgp2e6EU_n8cxDbbH6tklSfe01a2CvXrAmLV-aKcjuKj5FRRajTosRch1Zudx1x_NaV2xbQZaq05fbW1oXmXRiUZp08/s0/rss.png'); }
.youtube{ background:url('https://lh6.googleusercontent.com/-EjnvqvxdSIQ/T40l3XSfhlI/AAAAAAAAB9s/4VnPEZgDXSQ/s32/YouTube.png'); }
.googleplus{ background:url('https://blogger.googleusercontent.com/img/b/R29vZ2xl/AVvXsEjinrQqgMp6vX6NraWcUdEAfLifh3m6JZ8GTyTum4qAw44D942IqJvydvbubtmDDnxpTaZ4v7pE_3SQnVMHUUK-VocW__7R0mcSSnrfbmqiNBeQltqR8wJ3AlCCKKsVjYOE5XG-AxWgOrw/s0/gplus.png.png'); }
.mixsocial{ background:url('https://lh6.googleusercontent.com/-xcHvGi2TpZk/T6jP9vrvTMI/AAAAAAAACGg/7mFW9zJeCic/s32/myspace.png'); }
#email-news-subscribe .email-box{
padding: 5px 10px;
font-family: "Arial","Helvetica",sans-serif;
height:35px;}
#email-news-subscribe .email-box input.email{
background:#FFFFFF;
border: 1px solid #dedede;
color: #999;
padding: 7px 10px 8px 10px;
-moz-border-radius: 3px;
-webkit-border-radius: 3px;
-o-border-radius: 3px;
-ms-border-radius: 3px;
-khtml-border-radius: 3px;
border-radius: 3px;
border-image: initial;
font-family: "Arial","Helvetica",sans-serif;}
#email-news-subscribe .email-box input.email:focus{color:#333}
#email-news-subscribe .email-box input.subscribe{
background: -moz-linear-gradient(center top,#FFCA00 0,#FF9B00 100%);
background: -webkit-gradient(linear,left top,left bottom,color-stop(0,#FFCA00),color-stop(1,#FF9B00));
background: -moz-linear-gradient(center top,#FFCA00 0,#FF9B00 100%);
-pie-background: linear-gradient(270deg,#ffca00,#ff9b00);
font-family: "Arial","Helvetica",sans-serif;
border-radius:3px;
-moz-border-radius:3px;
-webkit-border-radius:3px;
border:1px solid #cc7c00;
color:white;
text-shadow:#d08d00 1px 1px 0;
padding:7px 14px;
margin-left:3px;
font-weight:bold;
font-size:12px;
cursor:pointer;
border-image: initial;}
#email-news-subscribe .email-box input.subscribe:hover{
background: #ff9b00;
background-image:-moz-linear-gradient(top,#ffda4d,#ff9b00);
background-image:-webkit-gradient(linear,left top,left bottom,from(#ffda4d),to(#ff9b00));
filter:progid:DXImageTransform.Microsoft.Gradient(startColorStr=#ffffff,endColorStr=#ebebeb);
outline:0;-moz-box-shadow:0 0 3px #999;
-webkit-box-shadow:0 0 3px #999;
box-shadow:0 0 3px #999
background:-webkit-gradient(linear,left top,left bottom,color-stop(0,#ffda4d),color-stop(1,#ff9b00));
background:-moz-linear-gradient(center top,#ffda4d 0,#ff9b00 100%);
-pie-background:linear-gradient(270deg,#ffda4d,#ff9b00);
border-radius:3px;
-moz-border-radius:3px;
-webkit-border-radius:3px;
border:1px solid #cc7c00;
color:#FFFFFF;
text-shadow:#d08d00 1px 1px 0}
</style>
<!--[if IE]>
<style>
#email-news-subscribe .email-box input.subscribe{
background: #FFCA00;
}
</style>
<![endif]-->
<center id="exeideasbody">
<div class="spinning_icons">
<a href="http://twitter.com/Arnydgreat" class="twitter" title="twitter">Twitter</a>
<a href="http://facebook.com/MediaFireMoviesHeaven" class="facebook" title="facebook">Facebook</a>
<a href="http://pk.linkedin.com/in/Profile" class="linkedin" title="linkedin">Linkedin</a>
<a href="https://plus.google.com/102256859586166648016" class="googleplus" title="Google Plus">Google Plus</a>
<a href="http://feeds.feedburner.com/EXEIdeas" class="rss" title="rss">RSS</a>
<a href="http://www.youtube.com/softwaresntrick" class="youtube" title="youtube">YouTube</a>
<a href="http://www.softwaresntrick.blogspot.in/p/about-us.html" class="mixsocial" title="Other Social">Social</a>
</div>
<div id="email-news-subscribe">
<div class="email-box">
<form action="http://feedburner.google.com/fb/a/mailverify" method="post" target="popupwindow" onsubmit="window.open('http://feedburner.google.com/fb/a/mailverify?uri=softwaresntrick', 'popupwindow', 'scrollbars=yes,width=550,height=520');return true">
<input class="email" type="text" style="width: 150px; font-size: 12px;" id="email" name="email" value="Enter Your Email here.." onfocus="if(this.value==this.defaultValue)this.value=&#39;&#39;;" onblur="if(this.value==&#39;&#39;)this.value=this.defaultValue;" />
<input type="hidden" value="softwaresntrick" name="uri" />
<input type="hidden" name="loc" value="en_US" />
<input class="subscribe" name="commit" type="submit" value="Subscribe" />
</form>
</div>
</div>
</center>
<!-- This Is A CopyRight Code Of Softwaresntrick.It Is Free To Use But With HTML Design Code.If AnyOne Found To Be Changing This Code Should Be Under Legal Action Via DMCA. -->

Customization:
1.) Change MediafireMoviesHeaven With Your FacebookLinks.
2.) Change Arnydgreat With Your Twitter Account.
3.) Change Softwaresntrick with your youtube channel Name
4.) Change softwaresntrick withyour linkedin account.
4.) Save And Done.


Add, Embed Youtube Subscribe Widget for Website, Blog


Today the question is How To Add Or Embed Youtube Subscribe Widget On Blog And Website To Get More YouTube Subscribe And Can Expand Your Social Network Quickly?
Subscribe Widget for Your Youtube Channel Videos, Place a Youtube Channel Subscribe widget on your website or blog and increase your subscriber. To add this simply just embed the following code below into the html of your website or blog, in the same way you embed a YouTube video or anything:

Add, Embed Youtube Subscribe Widget for Website, Blog 

Features:
1.) Easy To Install.
2.) No Much Customization.
3.) Video's Counter And Subscriber Counter Included.


How To Add In Blogspot?
1.) Go To Your www.blogger.com
2.) Open Your Desire Blog.
3.) Go To Layout.
4.) Click "Add A Gadget" Where You Want To Add It.
5.) Now Scroll To "HTML-JAVASCRIPT"
6.) Click "+" Icon To Add It.
7.) Now Copy And Paste The Code There.
8.) Leave The Title Empty.
9.) Click Save
10.) You Are Done.


How To Add In Website?
1.) Open Your HTML File.
2.) Copy And Paste The Code Anywhere Between <body> </body>.
3.) Save It
4.) You Are Done.


Customization:
1.) Just Replace softwaresntrick With Your Youtube Channel Name.
2.) Change Width And Height According To Your Desire.
3.) Save And Done.

Add ‘‘Seated Twitter Bird’’ Widget To Blog & Website

Add ‘‘Seated Twitter Bird’’ Widget To Blog & Website

With Twitter's worldwide popularity and with over 200 million users, generating 65 million tweets a day, it has become a must for every web master to use twitter sharing buttons and applications as much on his web as possible. This lets users to easily tweet our blogs and websites which thereby generates traffic for us in return. I coded a beautiful cute twitter bird that sit on the corner of your web page as you scroll up or down.
To make your bloggers to follow you in twitter and to get them your posts update. Add this widget and gain your twitter followers to spread your social network. Add a stylish ‘Sitting twitter bird to your blogger’ by following procedure.


Features:
1.) It Is Compatible With All Browsers.
2.) It Will Remain Seated Even You Scroll You Page Or Not.
3.) Easy To Install And Quick To Load With Cute Style.


How To Add In Blogspot?
1.) Go To Your www.blogger.com
2.) Open Your Desire Blog.
3.) Go To Layout.
4.) Click "Add A Gadget" Where You Want To Add It.
5.) Now Scroll To "HTML-JAVASCRIPT"
6.) Click "+" Icon To Add It.
7.) Now Copy The Below Code And Paste It To There.
8.) Leave The Title Empty.
9.) Click Save, Now You Are Done.


How To Add In Website?
1.) Just Go To Your HTML File.
2.) Now Copy The Below Code And Paste It Between <body> </body>.
3.) Save It, Now You Are Done.


Customization:
1.) Change With Your Twitter UserName.
2.) Change Blue No With Your Desired Width.
3.) Save And Done.


Add Stylish Mashable Sharing Widget to Blog And Website

Add Stylish Mashable Sharing Widget to Blog And Website


The great social media blog Mashable is always an inspiration in whatever they do. This widget can now be used in every blogspot blog just with an extremely easy installation step. As you can see this widget contains links to your Facebook Fan page, Google+ page and recommendation button, twitter follow button, RSS and LinkedIn links and most importantly an attractive subscription form that will further increase the number of your Email subscribers. The conversion didn't took me very long and I am pleased to present it to all of you.


Features:
1.) Stylish And Awesome.
2.) Facebook FanPage Like Button.
3.) Twitter Follow Button.
4.) LinkedIn Add Button.
5.) Google +1 Recommend Button.
6.) RSS Feed Button.
7.) E-Mail Subscription Box.
8.) Google Plus Profile Button.


How To Add In Blogspot?
1.) Go To Your www.blogger.com
2.) Open Your Desire Blog.
3.) Go To Layout.
4.) Click "Add A Gadget" Where You Want To Add It.
5.) Now Scroll To "HTML-JAVASCRIPT"
6.) Click "+" Icon To Add It.
7.) Now Copy The Below Code And Paste It To There.
8.) Leave The Title Empty.
9.) Click Save, Now You Are Done.


How To Add In Website?
1.) Just Go To Your HTML File.
2.) Now Copy The Below Code And Paste It Between <body> </body>.
3.) Save It, Now You Are Done.

   
<style>
/* Social Widget */
#MBT-mashable-bar {
border: 0;
margin-bottom: 10px;
margin: 0 auto;
width:300px;
}
.fb-likebox {
background: #fff;
padding: 10px 10px 0 10px;
border: 1px solid #D8E6EB;
margin-top: -2px;
height:80px;
}
.googleplus {
background: #F5FCFE;
border-top: 1px solid #FFF;
border-bottom: 1px solid #ebebeb;
border-right: 1px solid #D8E6EB;
border-left: 1px solid #D8E6EB;
border-image: initial;
font-size: .90em;
font-family: "Arial","Helvetica",sans-serif;
color: #000;
padding: 9px 11px;
line-height: 1px;}
.googleplus span {
color: #000;
font-size: 11px;
position: absolute;
display:inline-block;
margin: 9px 70px;}
.g-plusone { float: left;}
.twitter {
background: #EEF9FD;
padding: 10px;
border: 1px solid #C7DBE2;
border-top: 0;}
#mashable {
background: #EBEBEB;
border: 1px solid #CCC;
border-top: 1px solid white;
padding: 2px 8px 2px 3px;
text-align: right;
border-image: initial;}
#mashable .author-credit {}
#mashable .author-credit a {
font-size: 10px;
font-weight: bold;
text-shadow: 1px 1px white;
color: #1E598E;
text-decoration:none;}
#email-news-subscribe .email-box{
padding: 5px 10px;
font-family: "Arial","Helvetica",sans-serif;
border-top: 0;
border-right: 1px solid #C7DBE2;
border-left: 1px solid #C7DBE2;
border-image: initial;
height:35px;}
#email-news-subscribe .email-box input.email{
background:#FFFFFF;
border: 1px solid #dedede;
color: #999;
padding: 7px 10px 8px 10px;
-moz-border-radius: 3px;
-webkit-border-radius: 3px;
-o-border-radius: 3px;
-ms-border-radius: 3px;
-khtml-border-radius: 3px;
border-radius: 3px;
border-image: initial;
font-family: "Arial","Helvetica",sans-serif;}
#email-news-subscribe .email-box input.email:focus{color:#333}
#email-news-subscribe .email-box input.subscribe{
background: -moz-linear-gradient(center top,#FFCA00 0,#FF9B00 100%);
background: -webkit-gradient(linear,left top,left bottom,color-stop(0,#FFCA00),color-stop(1,#FF9B00));
background: -moz-linear-gradient(center top,#FFCA00 0,#FF9B00 100%);
-pie-background: linear-gradient(270deg,#ffca00,#ff9b00);
font-family: "Arial","Helvetica",sans-serif;
border-radius:3px;
-moz-border-radius:3px;
-webkit-border-radius:3px;
border:1px solid #cc7c00;
color:white;
text-shadow:#d08d00 1px 1px 0;
padding:7px 14px;
margin-left:3px;
font-weight:bold;
font-size:12px;
cursor:pointer;
border-image: initial;}
#email-news-subscribe .email-box input.subscribe:hover{
background: #ff9b00;
background-image:-moz-linear-gradient(top,#ffda4d,#ff9b00);
background-image:-webkit-gradient(linear,left top,left bottom,from(#ffda4d),to(#ff9b00));
filter:progid:DXImageTransform.Microsoft.Gradient(startColorStr=#ffffff,endColorStr=#ebebeb);
outline:0;-moz-box-shadow:0 0 3px #999;
-webkit-box-shadow:0 0 3px #999;
box-shadow:0 0 3px #999
background:-webkit-gradient(linear,left top,left bottom,color-stop(0,#ffda4d),color-stop(1,#ff9b00));
background:-moz-linear-gradient(center top,#ffda4d 0,#ff9b00 100%);
-pie-background:linear-gradient(270deg,#ffda4d,#ff9b00);
border-radius:3px;
-moz-border-radius:3px;
-webkit-border-radius:3px;
border:1px solid #cc7c00;
color:#FFFFFF;
text-shadow:#d08d00 1px 1px 0}
#other-social-bar {
background-color: #D8E6EB;
box-shadow: 0 1px 1px #FFFFFF inset;
padding: 0px;
font-family: "Arial","Helvetica",sans-serif;
font-weight:bold;
overflow: hidden;
border: 1px solid #B6D0DA;
height:37px;
}
#other-social-bar ul {list-style: none outside none; padding-left: 4px;}
#other-social-bar .other-follow {
float: left;
color:#1E598E;
overflow: hidden;
height:20px;
padding:5px;
width: 270px;}
#other-social-bar .other-follow ul {
list-style: none outside none;
padding-left: 4px;}
#other-social-bar .other-follow ul li {
font-size: 12px;
font-weight: bold;
display:inline;
border:0;
text-shadow: 1px 1px white;}
#other-social-bar .other-follow ul li a {
font-size: 12px;
color:#1E598E;
font-weight: bold;
display:inline;
text-shadow: 1px 1px white;}
#other-social-bar .other-follow li {
font-size: 12px;
font-weight: bold;
display:inline;
border:0;
text-shadow: 1px 1px white;}
#other-social-bar .other-follow li a {
font-size: 12px;
color:#1E598E;
font-weight: bold;
display:inline;
text-shadow: 1px 1px white;}
#other-social-bar .other-follow li.my-rss {
background: url('https://blogger.googleusercontent.com/img/b/R29vZ2xl/AVvXsEh1wtRuXIIWNFNDqOYe4S9JuDg0yJQADkxGc7FSKcLRURwCGyf69f5sbWe96uqalW3e1xJZ_-9-bUaU3s6PDteCLhfRmn76b_InDvtCEyUOEkcc5VerMaOUNwkaaqJ91N1RK1UTDmx5JOQ/s400/rss-16x16.png') no-repeat transparent;
line-height: 1;
padding: 0px 3px 1px 20px;
width: 60px;
margin-bottom:0px;
margin-left:5px;}

#other-social-bar .other-follow li.my-rss a, #other-social-bar .other-follow li.my-linkedin a, #other-social-bar .other-follow li.my-gplus a{
text-decoration:none;
}
#other-social-bar .other-follow li.my-rss a:hover, #other-social-bar .other-follow li.my-linkedin a:hover, #other-social-bar .other-follow li.my-gplus a:hover{
text-decoration:underline;
}
#other-social-bar .other-follow li.my-linkedin {
background: url('https://blogger.googleusercontent.com/img/b/R29vZ2xl/AVvXsEiI48v6-bk5ljVIZTDl_mI5gLkF4RhddATs1XNvAd7Sua9T5Kw6n4zsHsVQo3nkrS9XkAEbjRBwhAlBoDegXiL5ToQVH3rNOSQZuNyv3YnoA7p6TzVpoQ4xnRL9-f8AlZlymgkiR6JkD7c/s400/linkedin-16x16.png') no-repeat transparent;
line-height: 1;
padding: 0px 3px 1px 20px;
width: 60px;
margin-bottom:0px;}
#other-social-bar .other-follow li.my-gplus {
background: url(https://blogger.googleusercontent.com/img/b/R29vZ2xl/AVvXsEgHjspDF1MFQx-NN8qXAtu8tgkczwp6p95eB1bEb3-JKqB_9FGSbpo4OF81o2zQIpPajL0K5QkjZixcJhUc1BoT_5WgibAyYUqblU_tYZflUNCWsRey0sxRr4yPkV2j4O6Yv4zMSKWDHJc/s400/gplus-16x16.png) no-repeat transparent;
line-height: 1;
width: 60px;
padding: 0px 3px 1px 20px;
margin-bottom:0px;}
</style>
<!--[if IE]>
<style>
#email-news-subscribe .email-box input.subscribe{
background: #FFCA00;
}
</style>
<![endif]-->
<!--begin of social widget--> <div style="margin-bottom:10px;"> <div id="MBT-mashable-bar" > <!-- Begin Widget --> <div class="fb-likebox"> <!-- Facebook --> <iframe src="//www.facebook.com/plugins/like.php?href=http://facebook.com/MediaFireMoviesHeaven&amp;send=false&amp;layout=standard&amp; width=200px&amp;show_faces=true&amp;action=like&amp;colorscheme=light&amp;
font&amp;height=100px&amp;appId=234513819928295" scrolling="no" frameborder="0" style="border:none; overflow:hidden; "></iframe> </div> <div class="googleplus"> <!-- Google --> <span>Recommend us on Google!</span><div class="g-plusone" data-size="medium"></div> <script type="text/javascript" src="https://apis.google.com/js/plusone.js"></script> </div> <div class="twitter"> <!-- Twitter --> <iframe title="" style="width: 300px; height: 20px;" class="twitter-follow-button" src="http://platform.twitter.com/widgets/follow_button.html#_=1319978796351&amp;
align=&amp;button=blue&amp;id=twitter_tweet_button_0&amp;
lang=en&amp;link_color=&amp;screen_name=Arnydgreat&amp;show_count=&amp;
show_screen_name=&amp;text_color=" frameborder="0" scrolling="no"></iframe> </div> <div id="email-news-subscribe"> <!-- Email Subscribe --> <div class="email-box">
<form action="http://feedburner.google.com/fb/a/mailverify" method="post" target="popupwindow" onsubmit="window.open('http://feedburner.google.com/fb/a/mailverify?uri=EXEIdeas', 'popupwindow', 'scrollbars=yes,width=550,height=520');return true">
<input class="email" type="text" style="width: 150px; font-size: 12px;" id="email" name="email" value="Enter Your Email here.." onfocus="if(this.value==this.defaultValue)this.value=&#39;&#39;;" onblur="if(this.value==&#39;&#39;)this.value=this.defaultValue;" />
<input type="hidden" value="tntbystc" name="uri" />
<input type="hidden" name="loc" value="en_US" />
<input class="subscribe" name="commit" type="submit" value="Subscribe" />
</form>
</div> </div> <div id="other-social-bar"> <!-- Other Social Bar --> <ul class="other-follow"> <li class="my-rss"> <a rel="nofollow" title="RSS" href="http://feeds.feedburner.com/Mediafiremoviesheaven" target="_blank">RSS Feed</a> </li> <li class="my-linkedin"> <a rel="nofollow" title="linkedin" rel="author" href="LINKEDIN PROFILE LINK" target="_blank">linkedin</a> </li> <li class="my-gplus"> <a rel="nofollow" title="Google Plus" rel="author" href="https://plus.google.com/113836058658255622964" target="_blank">Google Plus</a> </li> </ul> </div> <div id="mashable" style="background: #EBEBEB;border: 1px solid #CCC;border-top: 1px solid white;padding: 1px 8px 1px 3px;text-align: right;border-image: initial;font-size:10px;font-family: "arial","helvetica",sans-serif;"> <span class="author-credit" style="font-family: Arial, Helvetica, sans-serif;"><a href="http://www.exeideas.com" target="_blank" >Want This »</a></span></div></div>
<!-- End Widget --> </div> <!--end of social widget-->


Customization:
1.) Replace Mediafiremoviesheaven With Your Facebook Username.
2.) Replace Arnydgreat With Your Twitter Username.
3.) Replace Mediafiremoviesheaven With Your Feedburner Title.
4.) Replace This http://feeds.feedburner.com/Mediafiremoviesheaven To Your FeedBurner URL.
5.) Replace LINKEDIN PROFILE LINK With Your Linkedin Profile Link.
6.) Replace https://plus.google.com/113836058658255622964 with your Google Plus profile link
7.) Hit Save And You Are All Done...!!!

Further Customization:
I have set the width of the widget to 300px. If in case your sidebar is small or big, you may then have to adjust this.
And second value will set the width of 150px the subscription input box.

Sources:www.mybloggertricks.com

Add Stylish Auto Hide Social Sharing Widget For Website Or Blog

Add Stylish Auto Hide Social Sharing Widget For Website

Sexy Auto Hide Social Bookmarking Widget. This widget developed for wordpress, website and tumblr by shareaholic . It contain over 75+ bookmarking sites in this widget. Many thanks to Shareaholic and i am just sharing this widget. Hope you enjoy with this post. Before going to install this widget let’s see its. One more thing before proceeding, This is originally created by www.shareaholic.com


Features:
1.) Small Size Means They Load FAST.
2.) They’re Animated, Mouseover Them.
3.) Smooth Opening Sharing Buttons.
4.) Quick To Load And Easy To Share.
5.) Stylish And Awesome.
6.) Looks Great On Mobile Devices.


How To Add In Website?
1.) Go To This Link.
2.) First Choose Your Platform.
3.) Customize Your Widget And Get The Code.
4.) Place The Code And Done.(A Step By Step Tutorial Is Available On Forwarding)

Add Stylish Auto Hide Social Sharing Widget For Website


Add Stylish Animated Socxial Sharing Bar Widget To Blogger

Add Stylish Animated Social Sharing Bar Widget To Blogger

Social networks can make a big difference on the popularity of a blog. Sites that communicate better and understand social media are usually the most popular.A move towards this goal would be to find a way to encourage your visitors to share your content on the networks they are most active on.Today we are doing just that, by using pure JavaScript with the jQuery framework, to make an animated sharing bar, which will enable your website visitors to share posts on a number of social networks.Now the question is How To Add Animated Sharing Bar To Blogger?


Features:
1.) Awesome Animated Social Sharing Widget.
2.) Automatically Rotating But Stop On Hover.
3.) Digg Share With Count Button.
4.) Tweet With Count Button.
5.) Facebook Share With Count Button.
6.) Reddit Share With Count Button.
7.) DZone Share  With Count Button.


How To Add In Blogspot?
1.) Go To Your www.blogger.com
2.) Open Your Desire Blog.
3.) Go To Edit HTML..
4.) Press "CTRL+F" And Find These Line.
     <div class='post-footer-line post-footer-line-2'/>
     <div class='post-footer-line post-footer-line-3'/>
     </div>
     </div>
5.) Now Copy The Below Code And Paste It Below The Above Code.
6.) Click Save, Now You Are Done.


<style type="text/css">
.exespotlightmenu{
width: 100%;
overflow:hidden;
}
.exespotlightmenu ul{
margin: 0;
padding: 0;
font: bold 14px Verdana; /* font style and size */
list-style-type: none;
text-align: center; /* "left", "center", or "right" align menu */
}
.exespotlightmenu li{
display: inline-block;
position:relative;
padding: 5px;
margin: 0;
margin-right: 5px; /* right margin between menu items */
}
.exespotlightmenu li a{
display:inline-block;
padding: 5px;
min-width:50px; /* horizontal diameter of spotlight */
height:50px; /* vertical diameter of spotlight */
text-decoration: none;
color: black;
margin: 0 auto;
overflow:hidden;
-moz-transition: all 0.5s ease-in-out; /* CSS3 transition to animate all A properties */
-webkit-transition: all 0.3s ease-in-out;
-o-transition: all 0.3s ease-in-out;
-moz-transition: all 0.3s ease-in-out;
-ms-transition: all 0.3s ease-in-out;
transition: all 0.3s ease-in-out;
}
.exespotlightmenu li:hover a{
color: white;
background: #a71b15; /* background color of spotlight */
-webkit-border-radius: 50%; /* large radius to create circular borders */
-moz-border-radius: 50%;
border-radius: 50%;
}
.exespotlightmenu li a exespan{
position:relative;
top:35%; /* move text down so it appears centered within menu item */
}
</style>
<div class="exespotlightmenu">
<ul>
<li><a href="##########"><exespan>Home</exespan></a></li>
<li><a href="##########"><exespan>About</exespan></a></li>
<li><a href="##########"><exespan>Portfolio</exespan></a></li>
<li><a href="##########"><exespan>Privacy</exespan></a></li>
<li><a href="##########"><exespan>Contact Us</exespan></a></li>
</ul>
</div>

Customization:
1.) This Widget Did Not Require Any Customization.
2.) This Widget Will Shown Up On Post Page Only.
3.) If You Want Any Customization, Feel Free To Ask.

Source:www.exeideas.com

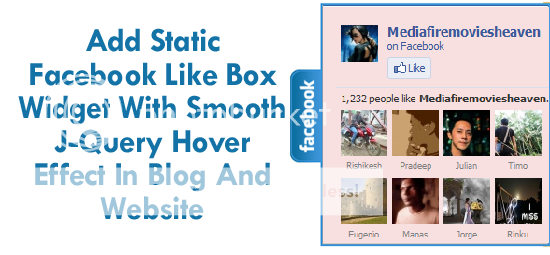
Add Static Facebook Like Box With Smooth J-Query Hover Effect In Blog Or WebSite

Add Static Facebook Like Box Widget With Smooth J-Query Hover Effect In Blog And Website

Facebook jquery pop up for facebook like box widget for bloggers (or) website. Advantages this widget is to free space on the page. Because Facebook can prevent website normal as the box. Static Pop Out Facebook as soft box with jQuery effect of activation for the blogger, this is another cool control. Here I have added as the box with simple jQuery hover effect. See Facebook static plate to the right of the page and move the mouse over the plate with the frame, as is visible by sliding to the left.
Just add it now and increase your fans and spice up your blog and website by saving space and having awesome look.


Features:
1.) J-Query POP OUT On Mouse Hover.
2.) Facebook Awesome Big Fans Widget.
3.) Quick To Load And Easy To Install.
4.) Awesome, Simple, Stylish And Beautiful Designed Latest Widget.
5) You Can Also Add This On Website. (Feel Free To Ask How To Do This?)


How To Add In Blogspot?
1.) Go To Your www.blogger.com
2.) Open Your Desire Blog.
3.) Go To Edit HTMlL
4.) Now Press {CTRL+F} And Find </head>.
5.) Now Copy The Below Code And Paste It Before </head> .
6.) Click Save, Now Proceed To The Next Step.


<script src='http://ajax.googleapis.com/ajax/libs/jquery/1.4.2/jquery.min.js' type='text/javascript'/>
<script type='text/javascript'>
jQuery(document).ready (
function(){jQuery(&quot;#facebook_right&quot;).hover(function(){ jQuery(this).stop(true,false).animate({right: 0}, 500); },
function(){ jQuery(&quot;#facebook_right&quot;).stop(true,false).animate({right: -249}, 500); });
});
</script>


7.) Now Go To Layout.
8.) Click "Add A Gadget" Where You Want To Add It.
9.) Now Scroll To "HTML-JAVASCRIPT"
10.) Click "+" Icon To Add It.
11.) Now Copy The Below Code And Paste It To There.
12.) Leave The Title Empty.
13.) Click Save, Now You Are Done.

   
<style>
img, a { border: 0; }
#on {visibility:visible;}
#off {visibility:hidden;}
#facebook_div {width:245px;height: 260px;overflow: hidden;}
#facebook_right {z-index: 10005;border:2px solid #3c95d9;background-color: #fff;width:245px;height: 260px;position: fixed;right: -249px;}
#facebook_right img {position: absolute;top: 70px;left: -35px;}
#facebook_right iframe {border:0px solid #3c95d9;overflow: hidden;position: static;height: 360px;left:-2px;top:-3px;}
</style>
<div id="on">
<div id="facebook_right" style="top: 30%;">
<div id="facebook_div">
<img src="https://blogger.googleusercontent.com/img/b/R29vZ2xl/AVvXsEhSANH-w9ZblAdWMSai3jtjl5l7PGOw7o0CduRCiMbO37mwTwEHQnRmpM65MljWMENcFu7k0hwBtE6nCnyWH88Ch8N_WDL1JYrUVqiQeGJE7hbEuHGVv0V6rBP2VpmmgBS38U7mlaSpyA/s1600/Facebook.png" />
<iframe src="http://www.facebook.com/plugins/likebox.php?href=http%3A%2F%2Ffacebook.com%2FMediaFireMoviesHeaven&amp;locale=en_GB&amp;width=245&amp;connections=9&amp;stream=&amp;header=false&amp;show_faces=0&amp;height=260" scrolling="no"></iframe>
</div>
</div>
</div>
Customization:
1.) Replace MediafireMoviesHeaven With Your Facebook FanPage UserName.
2.)Save And Enjoy...
3.) If You Want More Customization, Feel Free To Ask.


Source:www.exeideas.com

Add Smashing Floating Social Widget For Blog & Website

Add Smashing Floating Social Sharing Widget For Blog And Website

Now that most blogs are starting to pare-down their social media buttons and go with the dynamic widgets offered by the three or four largest social media sites, you’ve probably seen a few sites with a floating box that hovers along the left side, staying in the view port as you scroll.
How do you make one of those?
If you don’t mind making your own from scratch, Here is a great tutorial. His floating box looks nice, moves smoothly and is very customizable, since you’re adding it directly to your theme.


Features:-
1.) Facebook Like Button With Count.
2.) Google +1 Button With Count.
3.) Tweet Button With Count.
4.) LinkedIn Button With Count.
5.) Shaded Background.
6.) Fixed Position At Left-Down Space.


How To Add In Blogspot?
1.) Go To Your www.blogger.com
2.) Open Your Desire Blog.
3.) Go To Layout.
4.) Click "Add A Gadget" Where You Want To Add It.
5.) Now Scroll To "HTML-JAVASCRIPT"
6.) Click "+" Icon To Add It.
7.) Now Copy The Below Code And Paste It To There.
8.) Leave The Title Empty.
9.) Click Save, Now You Are Done.


How To Add In Website?
1.) Just Go To Your HTML File.
2.) Now Copy The Below Code And Paste It Between <body> </body>.
3.) Save It, Now You Are Done. 


<style>
#floatingbuttons{background:#aaa;background:-webkit-gradient(linear, left top, left bottom, color-stop(0, #f2f2f2), color-stop(1, #aaa));background:-moz-linear-gradient(top, #f2f2f2, #aaa);border:1px solid #808080;float:left;padding:0 0 3px 0;position:fixed;bottom:15%;left:0%;z-index:10;border-radius:0 5px 5px 0;box-shadow:2px 2px 5px rgba(0,0,0,0.3);}
#floatingbuttons .floatbutton{float:left;clear:both;margin:5px 4px 0 4px;} .addbuttons{clear:both;text-align:center;padding-top:5px;} .addbuttons a span.getfloat, .addbuttons a span.sharebuttons{color:#fff;background:none;font-family:arial, sans-serif;display:block;font-size:9px;font-weight:bold;text-decoration:none;line-height:11px;} .addbuttons a:hover span{color:#fff;background:none;text-decoration:underline;}
</style>
<br />
<div id='floatingbuttons' title="Share this post!">
<script src="http://connect.facebook.net/en_US/all.js#xfbml=1"></script>
<script type="text/javascript"> (function() { var s = document.createElement('SCRIPT'), s1 = document.getElementsByTagName('SCRIPT')[0]; s.type = 'text/javascript'; s.async = true; s.src = 'http://widgets.digg.com/buttons.js'; s1.parentNode.insertBefore(s, s1); })(); </script>
<!-- Medium Button -->
<script src='http://platform.twitter.com/widgets.js' type="text/javascript"></script>
<div class='floatbutton' id='facebook'>
<fb:like layout="box_count" show_faces="false" font=""></fb:like>
</div>
<div class='floatbutton' id='google+1'>
<script type="text/javascript" src="http://apis.google.com/js/plusone.js"> {lang: 'en-US'} </script>
<g:plusone size="tall"></g:plusone>
</div>
<div class='floatbutton' id='twitter'>
<a href="http://twitter.com/share" class="twitter-share-button" data-count="vertical" >Tweet</a>
</div>
<div class='floatbutton' id='linkedin'>
<script type="text/javascript" src="http://platform.linkedin.com/in.js"></script>
<script type="in/share" data-counter="top"></script>
</div>
</div>
Customization:
1.) Change  bottom:15% To Your Desire.
2.) Also Change  left:0% To Your Desire.
3.) Now Enjoy...


Source:www.exeideas.com