Showing posts with label HTML And CSS. Show all posts

Wednesday, 24 October 2012

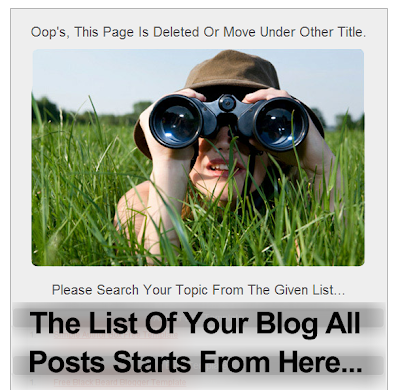
Awesome And Stylish Custom 404 Page With List Of All Posts

Awesome And Stylish Custom 404 Page With List Of All Posts

Whenever a web server is unable to locate a requested page, it returns a 404 error. These errors are often caused by users who input wrong addresses, but a site redesign can also result in a lot of incoming links that point to nonexistent pages or deleted. A visitor who arrives at a 404 page is highly likely to bounce, or immediately leave the website, because default error pages cause users to disengage from the content. That means a custom 404 page can be a perfect opportunity to reengage a portion of the readership, which can pull those valuable users back into the content of a site. Default 404 pages have changed very little over the years. Web servers provide bare bones 404 pages, and some browsers also include default error pages that are a little more helpful. These error pages are just designed to convey basic information, which means they do an extremely poor job of retaining users. Over the years, most people have become accustomed to simply closing their browser windows whenever a 404 error shows up.

Awesome And Stylish Custom 404 Page With List Of All Posts

You have to make it user friendly because the visitor will 101% disappointed after seeing that there required page is not found so don't let him angry but make it happy that i came here...There are a lot of different ways to handle a customized 404 page,some buddies share many of beautiful design pages having rest of page clear or gadgets but here i am sharing my own ideas that when visitor did not find there target then he is going to leave the sites or blog but when they see that there is another a list of HOT article available here the start seaching again and be happy. So first see the DEMO and then if you like this use it...


Features:
1.) An Awesome Image.
2.) A "List Of Your Blog's All Post" Under There Labels.
3.) Change Able Text.
4.) Easy To Install.
5.) Stylish And Beautiful Design.


How To Add In Blogspot?
1.) Go To Your www.blogger.com
2.) Open Your Desire Blog.
3.) Go To Layout.
4.) Click "Add A Gadget" Where You Want To Add It.
5.) Now Scroll To "HTML-JAVASCRIPT"
6.) Click "+" Icon To Add It.
7.) Now Copy The Below Code And Paste It To There.
8.) Leave The Title Empty.
9.) Click Save, Now You Are Done.


body {
    background: #2a2a2a url(http://biomechanism.com/wp-content/uploads/2012/01/blue-wp-background-200x200.jpg);
    width: 100%;
    color: #333;
    font-size: 12px;
    font-family: Arial, Tahoma, Verdana;
    margin: 0 auto 0;
    padding: 0;
}

Tuesday, 23 October 2012

Auto Image Thumbnail & ReadMore Link For Blogger Post

Some people looking for this code and he didn't find this because blogger create a template with this code and force people to use their template. But now peoples are free to use the code with their own desire template. So here we go on to finish the goal.


Features:-
1.) When you apply this code you need not to enter LINE BREAK option in your every new post even in old post, This will automatically break the line after some words.
2.) The first image of your post will be chosen for the view on main page of your blog for that post.
3.) If you already insert LINE BREAK option in your desire post, after applying this code you will see the two READ MORE link below of every post.Then Please Contact Me Or Comment Here, I Will Set It With You.


How To Apply The Code:-
Here we go:
Login to your Blogger account.
Go to Dashboard > Design > Edit HTML.
Back up your template.
Check the Expand Widget Templates check box on top right of the HTML window.
In the code window, look for </head> line.
Add the code below right after that line.


After that, find this line:
<data:post.body/>
Replace the line with this code:


Click Preview.
 If it works, then click Save Template.
 

Customizing the snippet:
You can customize the read more by changing the values of the variables below:
thumbnail_mode –set to “yes” if you want to show thumbnail with text summary. Set to other than “yes” to show only text summary.
summary_img –specify the number of characters (including spaces) you want to show in the summary, with thumbnail.
summary_noimg –specify the number of characters (including spaces) you want to show in the summary, when there is no thumbnail.
img_thumb_height and img_thumb_width -specify the thumbnail height and width (in pixels).
You can change the words “Read more” with your own by changing it in line 12 of the code in step 8.
Read More... Text  – you can also change this with image, Please comment here if you want read more image.

Don't Forget To Say Thank's


Animated Stylish CSS Navigation Menu For Blog And Website

Animated Stylish CSS Navigation Menu For Blog And Website

This is called CSS Spotlight Menu and idea and code provided by Dynamic Drive. I just update some code and share this in easy step here.
Spotlight Menu takes advantage of CSS3's border-radius property and transitions to add a circular background to its menu items when the mouse rolls over each one. The result is a Flash-like, sleek spotlight menu! The circular background appears in all major browsers, including IE9, while the transition effect works in browsers that support CSS3 transitions, namely, FF3.5+, Safari 3.1+, Google Chrome, and Opera 11.6+.
If you are asking how it works, First you implant this and see yourself how awesome it is...! Menu remains simple untill you move your cursor on it. When you make it hover there appear a square box that automatically start rounding its corner and finally it become circle as in the upper screen shoot.Is not Awesome...??? Just do it now...


Features:
1.) Simple And Easy To Install.
2.) Nice Animation Effect And Awesome Look.
3.) Easy To Add Links And Use.
4.) Without J-Query.
5.) Quick To Load.
6.) Works With IE9, FF3.5+, Safari 3.1+, Google Chrome, and Opera 11.6+ Browsers.


How To Add In Blogspot?
1.) Go To Your www.blogger.com
2.) Open Your Desire Blog.
3.) Go To Layout.
4.) Click "Add A Gadget" Where You Want To Add It.
5.) Now Scroll To "HTML-JAVASCRIPT"
6.) Click "+" Icon To Add It.
7.) Now Copy The Below Code And Paste It To There.
8.) Leave The Title Empty.
9.) Click Save, Now You Are Done.


How To Add In Website?
1.) Just Go To Your HTML File.
2.) Now Copy The Below Code And Paste It Between <body> </body>.
3.) Save It, Now You Are Done.


Customization:
1.) Change All Red Text With Your Links Name.
2.) Change All Blue Hash With Your Links.
3.) Save And Done.


All About CSS3 With Features, Requirment And Information

All About CSS3 With Features, Requirment And Information

A View On History Of CSS:-

CSS1:-
CSS1 is the first edition of Cascading Style Sheets which were introduced in 1996. It came with the support for several properties. Introduction of unique ‘id’ for each property and introduction of classes to properties that should have the same styles attributes were the most important things there were. Margin, border, padding and positioning also powered by style sheets although they could be done by using the HTML elements. Spacing between lines and rows of tables are also easily done using the stylesheets. The W3C stated the importance of using CSS instead of having the html as the giving the ability to optimization and making it easy for the designers to design and settle down the design easily.

CSS2:-
CSS2 was published in 1998. Positioning of index with several property values such like fixed, absolute, relative and indexing were the commonly highlighted ones among them. Bidirectional texts and some other new front properties such as shadows were introduced by this edition of CSS. Two updates and features came in to fix the errors in CSS 2. CSS 2.1 was the last 2nd generation edition of CSS.

CSS3:-
CSS3 is the latest edition of the CSS Stylesheets. There are several new functionalities have been provided through CSS3. Functions such like opacity, Text-overflow, media queries and box shadows are some of the much attractive introductions.

CSS3 Requirment

Who Supports CSS3?
To get a grasp of how much CSS3 has influenced web development, look no further than Microsoft’s own adoption of the markup language with the new Internet Explorer 9 released in March. Prior versions seemingly ignored most of what CSS3 brought to the table, but with IE9, all of the major browsers (not to mention the software used to design pages in the first place) finally embrace the technology -- allowing designers to at last show off their best efforts, regardless of platform.

CSS3 Properties List

Of course, users on older computers and browsers won’t be able to take full advantage of this advance without upgrading -- but as time goes on, we’ll all be using CSS3-compliant browsers and many of the old, complicated methods of developing websites will start to fade at long last.
All About CSS3 With Features, Requirment And Information 
What's New In CSS3:
Many exciting new functions and features are being thought up for CSS3. We will try and showcase some of them on this page, when they get implemented in either Firefox, Konqueror, Opera or Safari/Webkit.

Here They Are:

box-sizing
resize
outline
nav-top, nav-right, nav-bottom, nav-left

Selectors:
attribute selectors

Basic Box Model:
overflow-x, overflow-y

Generated Content:
content

Other Modules:
CSS3 Transitions
media queries
multi-column layout
Web fonts
speech